TTA Mi Lock Font (No Need Root , Acc , Internet)

====================================
=====================================
Zawgyi X1 ဆိုတာဘာလဲ?
================
ZawGyi Font အလွ ၇ မ်ိဳးကို MIUI8 အင္တာနက္မလို Root မလို Mi အေကာင့္မလိုပဲခ်ိန္းႏိုင္ပါတယ္။ ( Zawgyi X1 Font ကိုအေခ်ခံထားတာျဖစ္ပါတယ္)

ဘယ္လိုခ်ိန္းရမလဲ ?
============
Zawgyi X1 ခလုတ္ကိုႏွိပ္လိုက္ပါ မိမိၾကိဳက္တဲ့ Font ကိုႏွိပ္လိုက္ပါ System Font ဆုိတာေပၚလာပါမယ္ System Font ကိုႏွိပ္လိုက္ပါ ႏွိပ္တဲ့ Font နာမည္ေလးေပၚေနပါတယ္ (ဥပမာ ေဇာ္ဂ်ီ ZG ကိုႏွိပ္လိုက္ရင္
ေဇာ္ဂ်ီ ZG  ဆုိတာေပၚလာပါမယ္) အဲေကာင္ကိုတခ်က္ႏွိပ္ၿပီး Apply ပါ Reboot ႏွိပ္ပါ ဖုန္းပိတ္သြားၿပီးျပန္ပြင့္လာရင္ရပါၿပီ။

Disable Finddevice service ဆုိတာဘာလဲ ?
==========================
Finddevice Disable Service ကို User ေတြအသံုးမျပဳသင့္ပါ ဖုန္းဆားဗစ္သမားမ်ားအတြက္သာျဖစ္ပါ
တယ္ Finddevice Service ကို အလုပ္မလုပ္ေအာင္ကူညီေပးတဲ့ App ေလးျဖစ္ပါတယ္ ဒီ App ေလးအသံုးျပဳဖို႔ Root မလိုပါဘူး Disable ကိုႏွိပ္ၿပီး Install လုပ္ရုံပါပဲ။
.
ဘယ္လိုေနရာေတြမွာသံုးရမလဲ?
=====================
Wifi ခ်ိတ္လိုက္တာနဲ႔ Mi Lock က်သြားတဲ့ ဖုန္းေတြမွာသံုးလို႔ရပါတယ္ Wifi မခ်ိတ္ေသးခင္ ( ေလာ့မက်သြားေသးခင္) အသံုးျပဳႏိုင္ပါတယ္။
.
အလံုးတိုင္း Version တုိင္းမွာရလား?
=========================
အလံုးတိုင္းရမရမစမ္းရေသးေပမဲ့ Redmi 3s 3x နဲ႔ Mi5 တုိ႔မွာစမ္းသပ္ေအာင္ျမင္ပါတယ္ MIUI 8.0 ႏွင့္ေအာက္ ဗားရွင္းမ်ားမွာသာရပါတယ္ 8.1 မွာ Support မလုပ္ပါ ကဲလိုအပ္ရင္ေအာက္မွာ ေဒါင္းလုပ္ပါ။

Genx Mega Plus 8GB Firmware MT6582 Flash File Read Cm2


MT6582__alps__MEGA_PLUS__mz606__4.4.2__ALPS.KK1.MP1.V2.11

Wait for phone...
Phone found! [ 4 ]
Sync...
Inital Boot Ok!
BB_CPU_PID : 6582
BB_CPU_NME : [MediaTek] MT6582_S00
BB_CPU_EXT : 0xCA01 , 0x8A00 , 0x0000
Processing BROM stage
Settings for BROM configured!
SecCfgVal : 0x00000000
BromVer   : 0x00FF
BLVersion : 0x0001
PreLoader : Active [ Boot with PL ]
BootLdrSS : NORMAL with PRELOADER
Processing DA stage
DA Select done, will use MTK_AllInOne_DA_v5.1624.16.07
Sending and initialize DA ...
Running DA ver.4.2 on BBID : 0x87
NAND Flash : NOT INSTALLED
eMMC Flash : 8801034E436172642023CEA61F5712F1
Initialize Memory ...
DRAM already initialized by Preloader
DAgent sent , init HW now
eMMC FlashIC initialized
[eMMC] : FLASH_VEN : 0x88 , OEM : 0103
[eMMC] : FLASH_INF : [FORESEE] , draC
[eMMC] : FLASH_CID : 8801034E436172642023CEA61F5712F1
[eMMC] : FLASH_BRT : 0x00200000 , 0x00200000 , 0x00020000
[eMMC] : FLASH_LEN : 0x00000001CE100000
[eMMC] : FLASH_UCP : 7393 MiB [eMMC 8 GiB]
DEV RID    : 0xE5974B4AF47959173DE88426F5B25424
INT RAM    : 0x00020000
EXT RAM    : 0x40000000 [1 GiB]
BOOT TYPE  : EMMC_FLASH_BOOT
SOC VERIFY : C1
Boot Ok!

Reading Flash Content now ...

Brand     : alps
ProdName  : mz606
ProdModel : MEGA PLUS
Device    : mz606
AndroidVer: 4.4.2
MTKxCPU   : MT6582
MTKxPRJ   : ALPS.KK1.MP1.V2.11

[Read Ok] : preloader_mr601.bin
[Read Ok] : MBR
[Read Ok] : EBR1
[Read Ok] : lk.bin
[Read Ok] : boot.img
[Read Ok] : recovery.img
[Read Ok] : secro.img
[Read Ok] : logo.bin
[Read Ok] : EBR2
[Read Ok] : system.img
[Read Ok] : cache.img
[Read Ok] : userdata.img

[ScatCFG] : MT6582 / V1.1.1 / mr601 / EMMC
Android Info saved
MAUI Meta DB saved
HWConfig Info saved
FW Size : 934 MiB
Scatter saved to : C:\Users\babu\Desktop\read file\MT6582__alps__MEGA_PLUS__mz606__4.4.2__ALPS.KK1.MP1.V2.11\

All done!

preloader_mr601.bin (117.kb)

Whatsapp+IMO-00971551644035
Skype - dusto_babu


How to Flash Stock Firmware ROM (Flash File)

Step 1: Download and extract the firmware on your computer.
Step 2: After extracting you will find the SP Flash Tool, Driver and instruction manual.
Step 3: Install the USB Drivers (skip if drivers are already installed).
Step 4: Open the SP Flash Tool and load the Scatter File from the firmware folder.
Step 5: Connect your Smartphone to the computer using the USB Driver.
Step 6: Click on Upgrade / Download Button in the SP Flash Tool to Begin the Flashing.
Step 7: Green Ring will appear at the end of successful Flash.

Important Notes: Take a Backup of your mobile data before flashing or installing the firmware on your smartphone. As this will help you to recover the data whenever any thing wrong happens to your mobile.

Tichips T702 Prime2 Firmware MT6737 Flash File Read Cm2


MT6737__TICHIPS__T702_Prime2__T702_Prime2__6.0__TICHIPS-T702_prime2-Android_6.0-R02-20161116

Wait for phone...
Phone found! [ 4 ]
Sync...
Inital Boot Ok!
BB_CPU_PID : 6737
BB_CPU_NME : [MediaTek] MT6737M|MT6737_S00
BB_CPU_EXT : 0xCB00 , 0x8A00 , 0x0000
Processing BROM stage
Settings for BROM configured!
SecCfgVal : 0x00000000
BromVer   : 0x00FF
BLVersion : 0x0001
PreLoader : Active [ Boot with PL ]
BootLdrSS : NORMAL with PRELOADER
Processing DA stage
DA Select done, will use MTK_AllInOne_DA_v5.1624.16.07
Sending and initialize DA ...
Running DA ver.4.2 on BBID : 0x93
NAND Flash : NOT INSTALLED
eMMC Flash : 4500017045434148971401382580033A
Initialize Memory ...
DRAM already initialized by Preloader
DAgent sent , init HW now
eMMC FlashIC initialized
[eMMC] : FLASH_VEN : 0x70 , OEM : 0100
[eMMC] : FLASH_INF : [KINGSTON] , 8ECAH
[eMMC] : FLASH_CID : 7001004548414345380114973A03A325
[eMMC] : FLASH_BRT : 0x00400000 , 0x00400000 , 0x00400000
[eMMC] : FLASH_LEN : 0x0000000390000000
[eMMC] : FLASH_UCP : 14592 MiB [eMMC 16 GiB]
DEV RID    : 0xE5974B4A3F7AB2F8BBDFB38D96CC361C
INT RAM    : 0x00020000
EXT RAM    : 0x40000000 [1 GiB]
BOOT TYPE  : EMMC_FLASH_BOOT
SOC VERIFY : C1
Boot Ok!

Reading Flash Content now ...

xGPT : Normalize settings Ok!

Brand     : TICHIPS
ProdName  : T702 Prime2
ProdModel : T702 Prime2
Device    : T702 Prime2
AndroidVer: 6.0
MTKxCPU   : MT6737
MTKxPRJ   : TICHIPS-T702_prime2-Android_6.0-R02-20161116

[Read Ok] : preloader_aeon6737m_65_m0.bin
[Read Ok] : lk.bin
[Read Ok] : boot.img
[Read Ok] : recovery.img
[Read Ok] : logo.bin
[Read Ok] : secro.img
[Read Ok] : tz1.img
[Read Ok] : tz2.img
[Read Ok] : system.img
[Read Ok] : cache.img
[Read Ok] : userdata.img

[ScatCFG] : MT6737M / V1.1.2 / aeon6737m_65_m0 / EMMC
Android Info saved
MAUI Meta DB saved
HWConfig Info saved
FW Size : 2960 MiB
Scatter saved to : C:\Users\babu\Desktop\read file\MT6737__TICHIPS__T702_Prime2__T702_Prime2__6.0__TICHIPS-T702_prime2-Android_6.0-R02-20161116\

All done!

Whatsapp+IMO-00971551644035
Skype - dusto_babu

How to Flash Stock Firmware ROM (Flash File)

Step 1: Download and extract the firmware on your computer.
Step 2: After extracting you will find the SP Flash Tool, Driver and instruction manual.
Step 3: Install the USB Drivers (skip if drivers are already installed).
Step 4: Open the SP Flash Tool and load the Scatter File from the firmware folder.
Step 5: Connect your Smartphone to the computer using the USB Driver.
Step 6: Click on Upgrade / Download Button in the SP Flash Tool to Begin the Flashing.
Step 7: Green Ring will appear at the end of successful Flash.

Important Notes: Take a Backup of your mobile data before flashing or installing the firmware on your smartphone. As this will help you to recover the data whenever any thing wrong happens to your mobile.

Wintouch M99 Firmware KT961D_N2_V1.0 Flash File Read Cm2


KT961D_N2_V1.0
2016.0601

MT6580__JTY__M99__M99__5.1__KT961_L1_20160420

Wait for phone...
Phone found! [ 4 ]
Sync...
Inital Boot Ok!
BB_CPU_PID : 6580
BB_CPU_NME : [MediaTek] MT6580_S00
BB_CPU_EXT : 0xCA00 , 0x8A00 , 0x0000
Processing BROM stage
Settings for BROM configured!
SecCfgVal : 0x00000000
BromVer   : 0x00FF
BLVersion : 0x0001
PreLoader : Active [ Boot with PL ]
BootLdrSS : NORMAL with PRELOADER
Processing DA stage
DA Select done, will use MTK_AllInOne_DA_v5.1624.16.07
Sending and initialize DA ...
Running DA ver.4.2 on BBID : 0x94
NAND Flash : NOT INSTALLED
eMMC Flash : 45010053454D31364707D017685B9063
Initialize Memory ...
DRAM already initialized by Preloader
DAgent sent , init HW now
eMMC FlashIC initialized
[eMMC] : FLASH_VEN : 0x45 , OEM : 0100
[eMMC] : FLASH_INF : [SANDISK] , G61ME
[eMMC] : FLASH_CID : 45010053454D31364707D017685B9063
[eMMC] : FLASH_BRT : 0x00400000 , 0x00400000 , 0x00400000
[eMMC] : FLASH_LEN : 0x00000003AB400000
[eMMC] : FLASH_UCP : 15028 MiB [eMMC 16 GiB]
DEV RID    : 0xE5974B4ADADD1B0AE5B1EBF4B4D5066D
INT RAM    : 0x00020000
EXT RAM    : 0x40000000 [1 GiB]
BOOT TYPE  : EMMC_FLASH_BOOT
SOC VERIFY : C1
Boot Ok!

Reading Flash Content now ...

xGPT : Normalize settings Ok!

Brand     : JTY
ProdName  : M99
ProdModel : M99
Device    : M99
AndroidVer: 5.1
MTKxCPU   : MT6580
MTKxPRJ   : KT961_L1_20160420

[Read Ok] : preloader_kt961_hx_m99.bin
[Read Ok] : lk.bin
[Read Ok] : boot.img
[Read Ok] : recovery.img
[Read Ok] : logo.bin
[Read Ok] : secro.img
[Read Ok] : system.img
[Read Ok] : cache.img
[Read Ok] : userdata.img

[ScatCFG] : MT6580 / V1.1.2 / kt961_hx_m99 / EMMC
Android Info saved
MAUI Meta DB saved
HWConfig Info saved
FW Size : 1338 MiB
Scatter saved to : C:\Users\babu\Desktop\read file\MT6580__JTY__M99__M99__5.1__KT961_L1_20160420\

All done!

Done!
Elapsed: 00:08:12
Reconnect Power/Cable!


preloader_kt961_hx_m99.bin (122.kb)

Whatsapp+IMO-00971551644035
Skype - dusto_babu

How to Flash Stock Firmware ROM (Flash File)

Step 1: Download and extract the firmware on your computer.
Step 2: After extracting you will find the SP Flash Tool, Driver and instruction manual.
Step 3: Install the USB Drivers (skip if drivers are already installed).
Step 4: Open the SP Flash Tool and load the Scatter File from the firmware folder.
Step 5: Connect your Smartphone to the computer using the USB Driver.
Step 6: Click on Upgrade / Download Button in the SP Flash Tool to Begin the Flashing.
Step 7: Green Ring will appear at the end of successful Flash.

Important Notes: Take a Backup of your mobile data before flashing or installing the firmware on your smartphone. As this will help you to recover the data whenever any thing wrong happens to your mobile.

W&O W3 Firmware MT6580 Flash File Read Cm2


MT6580__alps__gxq6580_weg_l__gxq6580_weg_l__5.1__ALPS.L1.MP6.V2_GXQ6580.WEG.L_P69

Wait for phone...
Phone found! [ 4 ]
Sync...
Inital Boot Ok!
BB_CPU_PID : 6580
BB_CPU_NME : [MediaTek] MT6580_S00
BB_CPU_EXT : 0xCA00 , 0x8A00 , 0x0000
Processing BROM stage
Settings for BROM configured!
SecCfgVal : 0x00000000
BromVer   : 0x00FF
BLVersion : 0x0001
PreLoader : Active [ Boot with PL ]
BootLdrSS : NORMAL with PRELOADER
Processing DA stage
DA Select done, will use MTK_AllInOne_DA_v5.1624.16.07
Sending and initialize DA ...
Running DA ver.4.2 on BBID : 0x94
NAND Flash : NOT INSTALLED
eMMC Flash : 90014A4838473264040504A29E764201
Initialize Memory ...
DRAM already initialized by Preloader
DAgent sent , init HW now
eMMC FlashIC initialized
[eMMC] : FLASH_VEN : 0x90 , OEM : 014A
[eMMC] : FLASH_INF : [HYNIX] , d2G8
[eMMC] : FLASH_CID : 90014A4838473264040504A29E764201
[eMMC] : FLASH_BRT : 0x00400000 , 0x00400000 , 0x00400000
[eMMC] : FLASH_LEN : 0x00000001D2000000
[eMMC] : FLASH_UCP : 7456 MiB [eMMC 8 GiB]
DEV RID    : 0xE5974B4A76821B90F016817EAE77ACAC
INT RAM    : 0x00020000
EXT RAM    : 0x40000000 [1 GiB]
BOOT TYPE  : EMMC_FLASH_BOOT
SOC VERIFY : C1
Boot Ok!

Reading Flash Content now ...

xGPT : Normalize settings Ok!

Brand     : alps
ProdName  : full_gxq6580_weg_l
ProdModel : gxq6580_weg_l
Device    : gxq6580_weg_l
AndroidVer: 5.1
MTKxCPU   : MT6580
MTKxPRJ   : ALPS.L1.MP6.V2_GXQ6580.WEG.L_P69

[Read Ok] : preloader_gxq6580_weg_l.bin
[Read Ok] : lk.bin
[Read Ok] : boot.img
[Read Ok] : recovery.img
[Read Ok] : logo.bin
[Read Ok] : secro.img
[Read Ok] : system.img
[Read Ok] : cache.img
[Read Ok] : userdata.img

[ScatCFG] : MT6580 / V1.1.2 / gxq6580_weg_l / EMMC
Android Info saved
MAUI Meta DB saved
HWConfig Info saved
FW Size : 1392 MiB
Scatter saved to : C:\Users\babu\Desktop\read file\MT6580__alps__gxq6580_weg_l__gxq6580_weg_l__5.1__ALPS.L1.MP6.V2_GXQ6580.WEG.L_P69\

All done!

Whatsapp+IMO-00971551644035
Skype - dusto_babu

How to Flash Stock Firmware ROM (Flash File)

Step 1: Download and extract the firmware on your computer.
Step 2: After extracting you will find the SP Flash Tool, Driver and instruction manual.
Step 3: Install the USB Drivers (skip if drivers are already installed).
Step 4: Open the SP Flash Tool and load the Scatter File from the firmware folder.
Step 5: Connect your Smartphone to the computer using the USB Driver.
Step 6: Click on Upgrade / Download Button in the SP Flash Tool to Begin the Flashing.
Step 7: Green Ring will appear at the end of successful Flash.

Important Notes: Take a Backup of your mobile data before flashing or installing the firmware on your smartphone. As this will help you to recover the data whenever any thing wrong happens to your mobile.

Orro 1520 Firmware MT6572 Flash File Read Cm2


MT6572__lmkj__1520__1520__6.0__ALPS.KK1.MP7.V1

Wait for phone...
Phone found! [ 4 ]
Sync...
Inital Boot Ok!
BB_CPU_PID : 6572
BB_CPU_NME : [MediaTek] MT6572_S00
BB_CPU_EXT : 0xCA01 , 0x8A00 , 0x0000
Processing BROM stage
Settings for BROM configured!
SecCfgVal : 0x00000000
BromVer   : 0x00FF
BLVersion : 0x0001
PreLoader : Active [ Boot with PL ]
BootLdrSS : NORMAL with PRELOADER
Processing DA stage
DA Select done, will use MTK_AllInOne_DA_v5.1624.16.07
Sending and initialize DA ...
Running DA ver.4.2 on BBID : 0x88
NAND Flash : NOT INSTALLED
eMMC Flash : 90014A4834473164048603A2D20880E9
Initialize Memory ...
DRAM already initialized by Preloader
DAgent sent , init HW now
eMMC FlashIC initialized
[eMMC] : FLASH_VEN : 0x90 , OEM : 014A
[eMMC] : FLASH_INF : [HYNIX] , d1G4
[eMMC] : FLASH_CID : 90014A4834473164048603A2D20880E9
[eMMC] : FLASH_BRT : 0x00200000 , 0x00200000 , 0x00200000
[eMMC] : FLASH_LEN : 0x00000000E7000000
[eMMC] : FLASH_UCP : 3696 MiB [eMMC 4 GiB]
DEV RID    : 0xE5974B4A68284DA37027CD8E7378A3E6
INT RAM    : 0x00020000
EXT RAM    : 0x20000000 [512 MiB]
BOOT TYPE  : EMMC_FLASH_BOOT
SOC VERIFY : C1
Boot Ok!

Reading Flash Content now ...

Brand     : lmkj
ProdName  : 1520
ProdModel : 1520
Device    : 1520
AndroidVer: 6.0
MTKxCPU   : MT6572
MTKxPRJ   : ALPS.KK1.MP7.V1

[Read Ok] : preloader_lokyee72_cwet_kk_m12.bin
[Read Ok] : MBR
[Read Ok] : EBR1
[Read Ok] : lk.bin
[Read Ok] : boot.img
[Read Ok] : recovery.img
[Read Ok] : secro.img
[Read Ok] : logo.bin
[Read Ok] : system.img
[Read Ok] : cache.img
[Read Ok] : userdata.img

[ScatCFG] : MT6572 / V1.1.1 / lokyee72_cwet_kk_m12 / EMMC
Android Info saved
MAUI Meta DB saved
HWConfig Info saved
FW Size : 862 MiB
Scatter saved to : C:\Users\babu\Desktop\read file\MT6572__lmkj__1520__1520__6.0__ALPS.KK1.MP7.V1\

All done!


Whatsapp+IMO-00971551644035
Skype - dusto_babu

How to Flash Stock Firmware ROM (Flash File)

Step 1: Download and extract the firmware on your computer.
Step 2: After extracting you will find the SP Flash Tool, Driver and instruction manual.
Step 3: Install the USB Drivers (skip if drivers are already installed).
Step 4: Open the SP Flash Tool and load the Scatter File from the firmware folder.
Step 5: Connect your Smartphone to the computer using the USB Driver.
Step 6: Click on Upgrade / Download Button in the SP Flash Tool to Begin the Flashing.
Step 7: Green Ring will appear at the end of successful Flash.

Important Notes: Take a Backup of your mobile data before flashing or installing the firmware on your smartphone. As this will help you to recover the data whenever any thing wrong happens to your mobile.

Astarry Sun1 Firmware MT6580 Flash File Read Cm2

MT6580__Astarry__Sun1__Sun1__6.0__alps-mp-m0.mp1-V2.34_droi6580.we.m_P16

Operation : Read Flash [ v1.58 ]

1. Power Off Phone , Remove battery , Insert back
2. Insert USB cable. In some cases require hold BootKey

Wait for phone...
Phone found! [ 4 ]
Sync...
Inital Boot Ok!
BB_CPU_PID : 6580
BB_CPU_NME : [MediaTek] MT6580_S00
BB_CPU_EXT : 0xCA00 , 0x8A00 , 0x0000
Processing BROM stage
Settings for BROM configured!
SecCfgVal : 0x00000000
BromVer   : 0x00FF
BLVersion : 0x0001
PreLoader : Active [ Boot with PL ]
BootLdrSS : NORMAL with PRELOADER
Processing DA stage
DA Select done, will use MTK_AllInOne_DA_v5.1624.16.07
Sending and initialize DA ...
Running DA ver.4.2 on BBID : 0x94
NAND Flash : NOT INSTALLED
eMMC Flash : 150100463732324D4200B0869AC8933D
Initialize Memory ...
DRAM already initialized by Preloader
DAgent sent , init HW now
eMMC FlashIC initialized
[eMMC] : FLASH_VEN : 0x15 , OEM : 0100
[eMMC] : FLASH_INF : [SAMSUNG] , BM227
[eMMC] : FLASH_CID : 150100463732324D4200B0869AC8933D
[eMMC] : FLASH_BRT : 0x00400000 , 0x00400000 , 0x00080000
[eMMC] : FLASH_LEN : 0x00000001D2000000
[eMMC] : FLASH_UCP : 7456 MiB [eMMC 8 GiB]
DEV RID    : 0xE5974B4AF4058FC2E3AC55443DBBA7A3
INT RAM    : 0x00020000
EXT RAM    : 0x40000000 [1 GiB]
BOOT TYPE  : EMMC_FLASH_BOOT
SOC VERIFY : C1
Boot Ok!

Reading Flash Content now ...

xGPT : Normalize settings Ok!

Brand     : Astarry
ProdName  : Sun1
ProdModel : Sun1
Device    : Sun1
AndroidVer: 6.0
MTKxCPU   : MT6580
MTKxPRJ   : alps-mp-m0.mp1-V2.34_droi6580.we.m_P16

[Read Ok] : preloader_wf181v_hml_1b.bin
[Read Ok] : lk.bin
[Read Ok] : boot.img
[Read Ok] : recovery.img
[Read Ok] : logo.bin
[Read Ok] : secro.img
[Read Ok] : system.img
[Read Ok] : cache.img
[Read Ok] : userdata.img

[ScatCFG] : MT6580 / V1.1.2 / wf181v_hml_1b / EMMC
Android Info saved
MAUI Meta DB saved
HWConfig Info saved
FW Size : 2097 MiB
Scatter saved to : C:\Users\babu\Desktop\read file\MT6580__Astarry__Sun1__Sun1__6.0__alps-mp-m0.mp1-V2.34_droi6580.we.m_P16\

All done!

Done!
Elapsed: 00:14:23
Reconnect Power/Cable!

Whatsapp+IMO-00971551644035
Skype - dusto_babu

How to Flash Stock Firmware ROM (Flash File)

Step 1: Download and extract the firmware on your computer.
Step 2: After extracting you will find the SP Flash Tool, Driver and instruction manual.
Step 3: Install the USB Drivers (skip if drivers are already installed).
Step 4: Open the SP Flash Tool and load the Scatter File from the firmware folder.
Step 5: Connect your Smartphone to the computer using the USB Driver.
Step 6: Click on Upgrade / Download Button in the SP Flash Tool to Begin the Flashing.
Step 7: Green Ring will appear at the end of successful Flash.

Important Notes: Take a Backup of your mobile data before flashing or installing the firmware on your smartphone. As this will help you to recover the data whenever any thing wrong happens to your mobile.

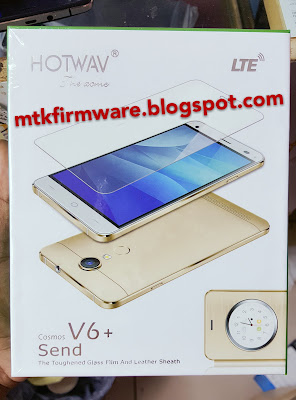
Hotwav Cosmos V6+ Firmware S7358 Flash File Read Cm2

S7358_HD_LM_scx35_s7358_hd_lm_5.1_S7358_HWD_V6_HOTWAV_648D3_HD_B1_V01.01.B06_Cosmos_V6.pac


Model Name  : s7358_hd_lmplus_dt_Multi
Model Brand : Cosmos_V6
Model Device: scx35_s7358_hd_lm
AndrVersion : 5.1
BaseBand CPU: S7358_HD_LM
Project Ver : S7358_HWD_V6_HOTWAV_648D3_HD_B1_V01.01.B06
Model Ext   : Cosmos_V6

[Read Mode] : HSUSB : 0x3000

[FW_READER] : Reading Firmware Now ...

[Read Ok] : u-boot-spl-16k.bin
[Read Ok] : u-boot.bin
[Read Ok] : prodnv.img
[Read Ok] : sc7731g_CP0_modem.bin
[Read Ok] : DSP_DM_Gx.bin
[Read Ok] : nvitem_w.bin
[Read Ok] : sc8830g_modem_CP2_WCN_14D_W15.31.1_Release.bin
[Read Ok] : nvitem_wcn.bin
[Read Ok] : logo_720x1280.bin
[Read Ok] : boot.img
[Read Ok] : system.img
[Build Ok] : cache.img
[Read Ok] : recovery.img
[Build Ok] : userdata.img

AndroidInfo created
Firmware Size : 1349 MiB
Saved to : C:\Users\babu\Desktop\read file\S7358_HD_LM_scx35_s7358_hd_lm_5.1_S7358_HWD_V6_HOTWAV_648D3_HD_B1_V01.01.B06_Cosmos_V6\
Done!

Elapsed: 00:22:14

Reconnect Power/Cable!


Operation : Convert InfinitySC to SPRD PAC [ v1.24 ]

Target : S7358_HD_LM_scx35_s7358_hd_lm_5.1_S7358_HWD_V6_HOTWAV_648D3_HD_B1_V01.01.B06_Cosmos_V6
Step  #1 : Identify

MEMORY : eMMC
LAYOUT : eMMC NORMAL

Step  #2 : Select logic
Select Logic : SC7731

Step  #3 : Processing data
Build PAC
[ADD FILE] : nvitem_w.bin
[ADD FILE] : nvitem_wcn.bin
[ADD FILE] : prodnv.img
[ADD FILE] : u-boot-spl-16k.bin
[ADD FILE] : sc7731g_CP0_modem.bin
[ADD FILE] : DSP_DM_Gx.bin
[ADD FILE] : sc8830g_modem_CP2_WCN_14D_W15.31.1_Release.bin
[ADD FILE] : logo_720x1280.bin
[ADD FILE] : boot.img
[ADD FILE] : system.img
[ADD FILE] : cache.img
[ADD FILE] : recovery.img
[ADD FILE] : userdata.img
[ADD FILE] : u-boot.bin
Build Ok! Result : 0x0016
Sign PAC ...
Sign Ok! FW compiled!
Elapsed: 00:05:00

Saved to : S7358_HD_LM_scx35_s7358_hd_lm_5.1_S7358_HWD_V6_HOTWAV_648D3_HD_B1_V01.01.B06_Cosmos_V6.pac
Done!


Whatsapp+IMO-00971551644035
Skype - dusto_babu

How To Flash:
its a PAC flash file Read With CM2 Box and you can flash it with CM2 box and Spd flash tool .
Open the CM2SPD Tool.
Select CPU Boot Which supports you mobile phone.
Click flash button and Select Pac option.
Browse file which’s name is (SC77xx_FLASH_CONF.pac)
Now click flash button
Plug-in the USB cable to phone to connect it to your PC.
The process will be started,
Wait for a few minutes Till Your Device Restarted.

its Done enjoy

Important Notes: Take a Backup of your mobile data before flashing or installing the firmware on your smartphone. As this will help you to recover the data whenever any thing wrong happens to your mobile.

TTA Xiaomi Account Lock Disabler

Finddevice Service ကိုအလုပ္မလုပ္ေအာင္ကူညီေပးတဲ့ App ေလးျဖစ္ပါတယ္ ဒီ App ေလးအသံုးျပဳဖို႔ Root မလိုပါဘူး Disable ကိုႏွိပ္ၿပီး Install လုပ္ရုံပါပဲ။
.
ဘယ္လိုေနရာေတြမွာသံုးရမလဲ?
=====================
Wifi ခ်ိတ္လိုက္တာနဲ႔ Mi Lock က်သြားတဲ့ ဖုန္းေတြမွာသံုးလို႔ရပါတယ္ Wifi မခ်ိတ္ေသးခင္ ( ေလာ့မက်သြားေသးခင္) အသံုးျပဳႏိုင္ပါတယ္
.
အလံုးတိုင္း Version တုိင္းမွာရလား?
=========================
အလံုးတိုင္းရမရမစမ္းရေသးေပမဲ့ Redmi 3s 3x နဲ႔ Mi5 တုိ႔မွာစမ္းသပ္ေအာင္ျမင္ပါတယ္ MIUI 8.0 ႏွင့္ေအာက္ ဗားရွင္းမ်ားမွာသာရပါတယ္ 8.1 မွာ Support မလုပ္ပါ ကဲလိုအပ္ရင္ေအာက္မွာ ေဒါင္းလုပ္ပါ။

_________________________________________
Than Toe Aung Mobile Phones Service & Training
*Mobile Phone Software အေျခခံ ႏွင့္ အထူး*
ဖြင့္ၿပီ သင္သန္းသား ၅ ေယာက္သာလက္ခံမည့္ ၀ိုင္းသေဘာမ်ိဳးလက္ေတြ႕က်က် အေသးစိတ္သင္ေပးမယ့္သင္တန္းျဖစ္ပါတယ္။
----------------------------------------------
69x70 27 (Mandalay)
အေသးစိတ္ဆက္သြယ္ စံုစမ္းေမးျမန္းလိုပါက (09258854744 / 09781541005/ 09978075760)
-------------------------------------------------------------------------

Hotwav Cosmos V2+ Firmware s7350 Flash File Read Cm2


S7350_HD_LM_scx35_s7350_hd_lm_5.1_S7350_HWD_V2_HOTWAV_648D3_HD_B1_V01.01.B09_Cosmos_V2.pac

Phone found! [ 5 ]
Port Opened
Sync...
InitBoot Done [ 0x81 ] , Ver : SPRD3
Sync...
Sending FDL
[Info] : If SW freeze here more, than 15 seconds - remove cable
FDL Ready!
Boot Ver : SPRD 773x eMMC loader v3 Infinity
Sending FLASH FDL
FLASH FDL Ready!
Boot Ok!

Model Name  : s7350_hd_lmplus_dt_Multi
Model Brand : Cosmos_V2
Model Device: scx35_s7350_hd_lm
AndrVersion : 5.1
BaseBand CPU: S7350_HD_LM
Project Ver : S7350_HWD_V2_HOTWAV_648D3_HD_B1_V01.01.B09
Model Ext   : Cosmos_V2

[Read Mode] : HSUSB : 0x3000

[FW_READER] : Reading Firmware Now ...

[Read Ok] : u-boot-spl-16k.bin
[Read Ok] : u-boot.bin
[Read Ok] : prodnv.img
[Read Ok] : sc7731g_CP0_modem.bin
[Read Ok] : DSP_DM_Gx.bin
[Read Ok] : nvitem_w.bin
[Read Ok] : sc8830g_modem_CP2_WCN_14D_W15.31.1_Release.bin
[Read Ok] : nvitem_wcn.bin
[Read Ok] : logo_720x1280.bin
[Read Ok] : fblogo_720x1280.bin
[Read Ok] : boot.img
[Read Ok] : system.img
[Build Ok] : cache.img
[Read Ok] : recovery.img
[Build Ok] : userdata.img

AndroidInfo created
Firmware Size : 1368 MiB
Saved to : C:\Users\babu\Desktop\read file\S7350_HD_LM_scx35_s7350_hd_lm_5.1_S7350_HWD_V2_HOTWAV_648D3_HD_B1_V01.01.B09_Cosmos_V2\
Done!

Elapsed: 00:21:39

Reconnect Power/Cable!


Operation : Convert InfinitySC to SPRD PAC [ v1.24 ]

Target : S7350_HD_LM_scx35_s7350_hd_lm_5.1_S7350_HWD_V2_HOTWAV_648D3_HD_B1_V01.01.B09_Cosmos_V2
Step  #1 : Identify

MEMORY : eMMC
LAYOUT : eMMC NORMAL

Step  #2 : Select logic
Select Logic : SC7731

Step  #3 : Processing data
Build PAC
[ADD FILE] : nvitem_w.bin
[ADD FILE] : nvitem_wcn.bin
[ADD FILE] : prodnv.img
[ADD FILE] : u-boot-spl-16k.bin
[ADD FILE] : sc7731g_CP0_modem.bin
[ADD FILE] : DSP_DM_Gx.bin
[ADD FILE] : sc8830g_modem_CP2_WCN_14D_W15.31.1_Release.bin
[ADD FILE] : logo_720x1280.bin
[ADD FILE] : fblogo_720x1280.bin
[ADD FILE] : boot.img
[ADD FILE] : system.img
[ADD FILE] : cache.img
[ADD FILE] : recovery.img
[ADD FILE] : userdata.img
[ADD FILE] : u-boot.bin
Build Ok! Result : 0x0017
Sign PAC ...
Sign Ok! FW compiled!
Elapsed: 00:03:09

Saved to : S7350_HD_LM_scx35_s7350_hd_lm_5.1_S7350_HWD_V2_HOTWAV_648D3_HD_B1_V01.01.B09_Cosmos_V2.pac
Done!


Whatsapp+IMO-00971551644035
Skype - dusto_babu

How To Flash:
its a PAC flash file Read With CM2 Box and you can flash it with CM2 box only.
Open the CM2SPD Tool.
Select CPU Boot Which supports you mobile phone.
Click flash button and Select Pac option.
Browse file which’s name is (SC77xx_FLASH_CONF.pac)
Now click flash button
Plug-in the USB cable to phone to connect it to your PC.
The process will be started,
Wait for a few minutes Till Your Device Restarted.

its Done enjoy

Important Notes: Take a Backup of your mobile data before flashing or installing the firmware on your smartphone. As this will help you to recover the data whenever any thing wrong happens to your mobile.

Alcatel 5070D Firmware MT6735 Flash File Read Cm2

MT6735__TCL__5070D__P3-5_4G__5.1__ALPS.L1.MP3.V2_AUS6735M.65U.L1_P28

Wait for phone...
Phone found! [ 4 ]
Sync...
Inital Boot Ok!
BB_CPU_PID : 6735
BB_CPU_NME : [MediaTek] MT6735_S00
BB_CPU_EXT : 0xCA00 , 0x8A00 , 0x0000
Processing BROM stage
Settings for BROM configured!
SecCfgVal : 0x00000000
BromVer   : 0x00FF
BLVersion : 0x0001
PreLoader : Active [ Boot with PL ]
BootLdrSS : NORMAL with PRELOADER
Processing DA stage
DA Select done, will use MTK_AllInOne_DA_v5.1624.16.07
Sending and initialize DA ...
Running DA ver.4.2 on BBID : 0x93
NAND Flash : NOT INSTALLED
eMMC Flash : 510001154D533237036200424737DC90
Initialize Memory ...
DRAM already initialized by Preloader
DAgent sent , init HW now
eMMC FlashIC initialized
[eMMC] : FLASH_VEN : 0x15 , OEM : 0100
[eMMC] : FLASH_INF : [SAMSUNG] , BMS27
[eMMC] : FLASH_CID : 150100513732534D4200620390DC2347
[eMMC] : FLASH_BRT : 0x00400000 , 0x00400000 , 0x00080000
[eMMC] : FLASH_LEN : 0x00000001D2000000
[eMMC] : FLASH_UCP : 7456 MiB [eMMC 8 GiB]
DEV RID    : 0xE5974B4ABD424BAF60F15808F98F2A64
INT RAM    : 0x00020000
EXT RAM    : 0x40000000 [1 GiB]
BOOT TYPE  : EMMC_FLASH_BOOT
SOC VERIFY : C1
Boot Ok!

Reading Flash Content now ...

xGPT : Normalize settings Ok!

Brand     : TCL
ProdName  : 5070D
ProdModel : 5070D
Device    : P3-5_4G
AndroidVer: 5.1
MTKxCPU   : MT6735
MTKxPRJ   : ALPS.L1.MP3.V2_AUS6735M.65U.L1_P28

[Read Ok] : preloader_aus6735m_65u_l1.bin
[Read Ok] : lk.bin
[Read Ok] : boot.img
[Read Ok] : recovery.img
[Read Ok] : logo.bin
[Read Ok] : secro.img
[Read Ok] : tz1.img
[Read Ok] : tz2.img
[Read Ok] : system.img
[Read Ok] : cache.img
[Read Ok] : userdata.img

[ScatCFG] : MT6735M / V1.1.2 / aus6735m_65u_l1 / EMMC
Android Info saved
MAUI Meta DB saved
HWConfig Info saved
FW Size : 2034 MiB
Scatter saved to : C:\Users\babu\Desktop\read file\MT6735__TCL__5070D__P3-5_4G__5.1__ALPS.L1.MP3.V2_AUS6735M.65U.L1_P28\

All done!

Done!
Elapsed: 00:07:03
Reconnect Power/Cable!


Whatsapp+IMO-00971551644035
Skype - dusto_babu

How to Flash Stock Firmware ROM (Flash File)

Step 1: Download and extract the firmware on your computer.
Step 2: After extracting you will find the SP Flash Tool, Driver and instruction manual.
Step 3: Install the USB Drivers (skip if drivers are already installed).
Step 4: Open the SP Flash Tool and load the Scatter File from the firmware folder.
Step 5: Connect your Smartphone to the computer using the USB Driver.
Step 6: Click on Upgrade / Download Button in the SP Flash Tool to Begin the Flashing.
Step 7: Green Ring will appear at the end of successful Flash.

Important Notes: 
Take a Backup of your mobile data before flashing or installing the firmware on your smartphone. As this will help you to recover the data whenever any thing wrong happens to your mobile.

Gtouch C130 Firmware MT6572 Flash File Read Cm2


MT6572__K706-3G-HD-2__C130__kt07c_honghd__4.4.2__KT07C.3G-20151008

Operation : Read Flash [ v1.58 ]

1. Power Off Phone , Remove battery , Insert back
2. Insert USB cable. In some cases require hold BootKey

Wait for phone...
Phone found! [ 4 ]
Sync...
Inital Boot Ok!
BB_CPU_PID : 6572
BB_CPU_NME : [MediaTek] MT6572_S00
BB_CPU_EXT : 0xCA01 , 0x8A00 , 0x0000
Processing BROM stage
Settings for BROM configured!
SecCfgVal : 0x00000000
BromVer   : 0x00FF
BLVersion : 0x0001
PreLoader : Active [ Boot with PL ]
BootLdrSS : NORMAL with PRELOADER
Processing DA stage
DA Select done, will use MTK_AllInOne_DA_v5.1624.16.07
Sending and initialize DA ...
Running DA ver.4.2 on BBID : 0x88
NAND Flash : NOT INSTALLED
eMMC Flash : 1501004E355530304D00CFB85F757F1B
Initialize Memory ...
DRAM already initialized by Preloader
DAgent sent , init HW now
eMMC FlashIC initialized
[eMMC] : FLASH_VEN : 0x15 , OEM : 0100
[eMMC] : FLASH_INF : [SAMSUNG] , M00U5
[eMMC] : FLASH_CID : 1501004E355530304D00CFB85F757F1B
[eMMC] : FLASH_BRT : 0x00200000 , 0x00200000 , 0x00020000
[eMMC] : FLASH_LEN : 0x00000000E9000000
[eMMC] : FLASH_UCP : 3728 MiB [eMMC 4 GiB]
DEV RID    : 0xE5974B4A27CA29CFEDEA8F1797C440FB
INT RAM    : 0x00020000
EXT RAM    : 0x20000000 [512 MiB]
BOOT TYPE  : EMMC_FLASH_BOOT
SOC VERIFY : C1
Boot Ok!

Reading Flash Content now ...

Brand     : K706-3G-HD-2
ProdName  : kt07c_honghd
ProdModel : C130
Device    : kt07c_honghd
AndroidVer: 4.4.2
MTKxCPU   : MT6572
MTKxPRJ   : KT07C.3G-20151008

[Read Ok] : preloader_kt07_jty_gprs.bin
[Read Ok] : MBR
[Read Ok] : EBR1
[Read Ok] : lk.bin
[Read Ok] : boot.img
[Read Ok] : recovery.img
[Read Ok] : secro.img
[Read Ok] : logo.bin
[Read Ok] : system.img
[Read Ok] : cache.img
[Read Ok] : userdata.img

[ScatCFG] : MT6572 / V1.1.1 / kt07_jty_gprs / EMMC
Android Info saved
MAUI Meta DB saved
HWConfig Info saved
FW Size : 930 MiB
Scatter saved to : C:\Users\babu\Desktop\read file\MT6572__K706-3G-HD-2__C130__kt07c_honghd__4.4.2__KT07C.3G-20151008\

All done!

Done!
Elapsed: 00:05:40
Reconnect Power/Cable!

Whatsapp+IMO-00971551644035
Skype - dusto_babu


How to Flash Stock Firmware ROM (Flash File)

Step 1: Download and extract the firmware on your computer.
Step 2: After extracting you will find the SP Flash Tool, Driver and instruction manual.
Step 3: Install the USB Drivers (skip if drivers are already installed).
Step 4: Open the SP Flash Tool and load the Scatter File from the firmware folder.
Step 5: Connect your Smartphone to the computer using the USB Driver.
Step 6: Click on Upgrade / Download Button in the SP Flash Tool to Begin the Flashing.
Step 7: Green Ring will appear at the end of successful Flash.

Important Notes: 
Take a Backup of your mobile data before flashing or installing the firmware on your smartphone. As this will help you to recover the data whenever any thing wrong happens to your mobile.


M-Horse A10 MT6572 dead fix Paid Firmware

M-Horse A10 MT6572 dead fix Paid Firmware ကို Chat box တြင္လာေရာက္၀ယ္ယူႏုိင္ၿပီ
https://www.facebook.com/thantoeaungat

Xplay K8 Firmware MT6580 Flash File Read Cm2

MT6580__alps__K8__magc6580_we_l__5.1__ALPS.L1.MP6.V2_MAGC6580.WE.L_P33

Operation : Read Flash [ v1.58 ]

1. Power Off Phone , Remove battery , Insert back
2. Insert USB cable. In some cases require hold BootKey

Wait for phone...
Phone found! [ 4 ]
Sync...
Inital Boot Ok!
BB_CPU_PID : 6580
BB_CPU_NME : [MediaTek] MT6580_S00
BB_CPU_EXT : 0xCA00 , 0x8A00 , 0x0000
Processing BROM stage
Settings for BROM configured!
SecCfgVal : 0x00000000
BromVer   : 0x00FF
BLVersion : 0x0001
PreLoader : Active [ Boot with PL ]
BootLdrSS : NORMAL with PRELOADER
Processing DA stage
DA Select done, will use MTK_AllInOne_DA_v5.1624.16.07
Sending and initialize DA ...
Running DA ver.4.2 on BBID : 0x94
NAND Flash : NOT INSTALLED
eMMC Flash : 8801034E4361726420261A01432723C3
Initialize Memory ...
DRAM already initialized by Preloader
DAgent sent , init HW now
eMMC FlashIC initialized
[eMMC] : FLASH_VEN : 0x88 , OEM : 0103
[eMMC] : FLASH_INF : [FORESEE] , draC
[eMMC] : FLASH_CID : 8801034E4361726420261A01432723C3
[eMMC] : FLASH_BRT : 0x00400000 , 0x00400000 , 0x00400000
[eMMC] : FLASH_LEN : 0x00000001CE100000
[eMMC] : FLASH_UCP : 7393 MiB [eMMC 8 GiB]
DEV RID    : 0xE5974B4A352CA18D8923A997C9F957A4
INT RAM    : 0x00020000
EXT RAM    : 0x20000000 [512 MiB]
BOOT TYPE  : EMMC_FLASH_BOOT
SOC VERIFY : C1
Boot Ok!

Reading Flash Content now ...

xGPT : Normalize settings Ok!

Brand     : alps
ProdName  : full_magc6580_we_l
ProdModel : K8
Device    : magc6580_we_l
AndroidVer: 5.1
MTKxCPU   : MT6580
MTKxPRJ   : ALPS.L1.MP6.V2_MAGC6580.WE.L_P33

[Read Ok] : preloader_magc6580_we_l.bin
[Read Ok] : lk.bin
[Read Ok] : boot.img
[Read Ok] : recovery.img
[Read Ok] : logo.bin
[Read Ok] : secro.img
[Read Ok] : system.img
[Read Ok] : cache.img
[Read Ok] : userdata.img

[ScatCFG] : MT6580 / V1.1.2 / magc6580_we_l / EMMC
Android Info saved
MAUI Meta DB saved
HWConfig Info saved
FW Size : 1389 MiB
Scatter saved to : C:\Users\babu\Desktop\read file\MT6580__alps__K8__magc6580_we_l__5.1__ALPS.L1.MP6.V2_MAGC6580.WE.L_P33\

All done!

Done!
Elapsed: 00:12:04
Reconnect Power/Cable!

Whatsapp+IMO-00971551644035
Skype - dusto_babu


How to Flash Stock Firmware ROM (Flash File)

Step 1: Download and extract the firmware on your computer.
Step 2: After extracting you will find the SP Flash Tool, Driver and instruction manual.
Step 3: Install the USB Drivers (skip if drivers are already installed).
Step 4: Open the SP Flash Tool and load the Scatter File from the firmware folder.
Step 5: Connect your Smartphone to the computer using the USB Driver.
Step 6: Click on Upgrade / Download Button in the SP Flash Tool to Begin the Flashing.
Step 7: Green Ring will appear at the end of successful Flash.

Important Notes: Take a Backup of your mobile data before flashing or installing the firmware on your smartphone. As this will help you to recover the data whenever any thing wrong happens to your mobile.

Kzen G46 Firmware MT6582 Flash File Read Cm2

MT6582__Kzen__G46__702v82_zxdg552qhd_kzen__4.4.2__ALPS.KK1.MP1.V2.11

Wait for phone...
Phone found! [ 4 ]
Sync...
Inital Boot Ok!
BB_CPU_PID : 6582
BB_CPU_NME : [MediaTek] MT6582_S00
BB_CPU_EXT : 0xCB00 , 0x8A00 , 0x0000
Processing BROM stage
Settings for BROM configured!
SecCfgVal : 0x00000000
BromVer   : 0x00FF
BLVersion : 0x0001
PreLoader : Active [ Boot with PL ]
BootLdrSS : NORMAL with PRELOADER
Processing DA stage
DA Select done, will use MTK_AllInOne_DA_v5.1624.16.07
Sending and initialize DA ...
Running DA ver.4.2 on BBID : 0x87
NAND Flash : NOT INSTALLED
eMMC Flash : 45010053454D3038470F323732348179
Initialize Memory ...
DRAM already initialized by Preloader
DAgent sent , init HW now
eMMC FlashIC initialized
[eMMC] : FLASH_VEN : 0x45 , OEM : 0100
[eMMC] : FLASH_INF : [SANDISK] , G80ME
[eMMC] : FLASH_CID : 45010053454D3038470F323732348179
[eMMC] : FLASH_BRT : 0x00400000 , 0x00400000 , 0x00400000
[eMMC] : FLASH_LEN : 0x00000001D2000000
[eMMC] : FLASH_UCP : 7456 MiB [eMMC 8 GiB]
DEV RID    : 0xE5974B4AF1A1912023F4F1AD1CDC4FDD
INT RAM    : 0x00020000
EXT RAM    : 0x40000000 [1 GiB]
BOOT TYPE  : EMMC_FLASH_BOOT
SOC VERIFY : C1
Boot Ok!

Reading Flash Content now ...

Brand     : Kzen
ProdName  : e2702v82_zxdg552qhd_kzen
ProdModel : G46
Device    : 702v82_zxdg552qhd_kzen
AndroidVer: 4.4.2
MTKxCPU   : MT6582
MTKxPRJ   : ALPS.KK1.MP1.V2.11

[Read Ok] : preloader_e2702v82_zxdg552qhd_kzen.bin
[Read Ok] : MBR
[Read Ok] : EBR1
[Read Ok] : agold_driver.img
[Read Ok] : lk.bin
[Read Ok] : boot.img
[Read Ok] : recovery.img
[Read Ok] : secro.img
[Read Ok] : logo.bin
[Read Ok] : EBR2
[Read Ok] : system.img
[Read Ok] : cache.img
[Read Ok] : userdata.img

[ScatCFG] : MT6582 / V1.1.1 / e2702v82_zxdg552qhd_kzen / EMMC
Android Info saved
MAUI Meta DB saved
HWConfig Info saved
FW Size : 952 MiB
Scatter saved to : C:\Users\babu\Desktop\read file\MT6582__Kzen__G46__702v82_zxdg552qhd_kzen__4.4.2__ALPS.KK1.MP1.V2.11\

All done!

Done!
Elapsed: 00:04:34
Reconnect Power/Cable!

Whatsapp+IMO-00971551644035
Skype - dusto_babu


How to Flash Stock Firmware ROM (Flash File)

Step 1: Download and extract the firmware on your computer.
Step 2: After extracting you will find the SP Flash Tool, Driver and instruction manual.
Step 3: Install the USB Drivers (skip if drivers are already installed).
Step 4: Open the SP Flash Tool and load the Scatter File from the firmware folder.
Step 5: Connect your Smartphone to the computer using the USB Driver.
Step 6: Click on Upgrade / Download Button in the SP Flash Tool to Begin the Flashing.
Step 7: Green Ring will appear at the end of successful Flash.

Important Notes: Take a Backup of your mobile data before flashing or installing the firmware on your smartphone. As this will help you to recover the data whenever any thing wrong happens to your mobile.

Xtouch A1 Lte Firmware MT6735 Flash File Read Cm2


MT6735__XTOUCH__A1_LTE__A1_LTE__5.1__ALPS.L1.MP3.V1_VANZO6735M.35GC.L_P40

Operation : Read Flash [ v1.58 ]

1. Power Off Phone , Remove battery , Insert back
2. Insert USB cable. In some cases require hold BootKey

Wait for phone...
Phone found! [ 4 ]
Sync...
Inital Boot Ok!
BB_CPU_PID : 6735
BB_CPU_NME : [MediaTek] MT6735_S00
BB_CPU_EXT : 0xCA00 , 0x8A00 , 0x0000
Processing BROM stage
Settings for BROM configured!
SecCfgVal : 0x00000000
BromVer   : 0x00FF
BLVersion : 0x0001
PreLoader : Active [ Boot with PL ]
BootLdrSS : NORMAL with PRELOADER
Processing DA stage
DA Select done, will use MTK_AllInOne_DA_v5.1624.16.07
Sending and initialize DA ...
Running DA ver.4.2 on BBID : 0x93
NAND Flash : NOT INSTALLED
eMMC Flash : 510001154D533238FD6D004213830ED6
Initialize Memory ...
DRAM already initialized by Preloader
DAgent sent , init HW now
eMMC FlashIC initialized
[eMMC] : FLASH_VEN : 0x15 , OEM : 0100
[eMMC] : FLASH_INF : [SAMSUNG] , BMS28
[eMMC] : FLASH_CID : 150100513832534D42006DFDD60E8213
[eMMC] : FLASH_BRT : 0x00400000 , 0x00400000 , 0x00400000
[eMMC] : FLASH_LEN : 0x00000003A3E00000
[eMMC] : FLASH_UCP : 14910 MiB [eMMC 16 GiB]
DEV RID    : 0xE5974B4AEF1B15888F6D17D1F76C3F23
INT RAM    : 0x00020000
EXT RAM    : 0x60000000 [1,5 GiB]
BOOT TYPE  : EMMC_FLASH_BOOT
SOC VERIFY : C1
Boot Ok!

Reading Flash Content now ...

xGPT : Normalize settings Ok!

Brand     : XTOUCH
ProdName  : A1_LTE
ProdModel : A1_LTE
Device    : A1_LTE
AndroidVer: 5.1
MTKxCPU   : MT6735
MTKxPRJ   : ALPS.L1.MP3.V1_VANZO6735M.35GC.L_P40

[Read Ok] : preloader_n325b.bin
[Read Ok] : lk.bin
[Read Ok] : boot.img
[Read Ok] : recovery.img
[Read Ok] : logo.bin
[Read Ok] : secro.img
[Read Ok] : tz1.img
[Read Ok] : tz2.img
[Read Ok] : system.img
[Read Ok] : cache.img
[Read Ok] : userdata.img

[ScatCFG] : MT6735M / V1.1.2 / n325b / EMMC
Android Info saved
MAUI Meta DB saved
HWConfig Info saved
FW Size : 1437 MiB
Scatter saved to : C:\Users\babu\Desktop\read file\MT6735__XTOUCH__A1_LTE__A1_LTE__5.1__ALPS.L1.MP3.V1_VANZO6735M.35GC.L_P40\

All done!

Done!
Elapsed: 00:06:43
Reconnect Power/Cable!


Whatsapp+IMO-00971551644035
Skype - dusto_babu


How to Flash Stock Firmware ROM (Flash File)

Step 1: Download and extract the firmware on your computer.
Step 2: After extracting you will find the SP Flash Tool, Driver and instruction manual.
Step 3: Install the USB Drivers (skip if drivers are already installed).
Step 4: Open the SP Flash Tool and load the Scatter File from the firmware folder.
Step 5: Connect your Smartphone to the computer using the USB Driver.
Step 6: Click on Upgrade / Download Button in the SP Flash Tool to Begin the Flashing.
Step 7: Green Ring will appear at the end of successful Flash.

Important Notes: 
Take a Backup of your mobile data before flashing or installing the firmware on your smartphone. As this will help you to recover the data whenever any thing wrong happens to your mobile.